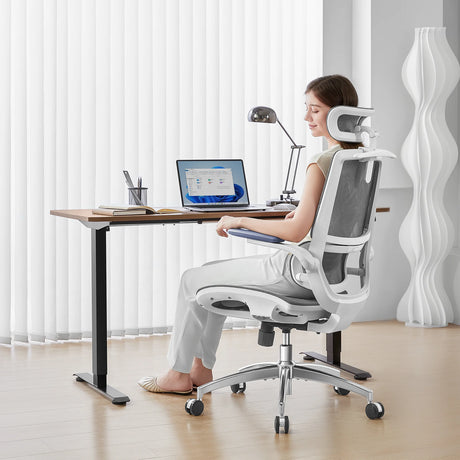
An ergonomic office chair not only enhances productivity but also promotes good posture and reduces the risk of musculoskeletal disorders. While there are plenty of ergonomic chairs available on the market, designing and building your own can offer a unique blend of satisfaction and tailor-made comfort. In this guide, we'll take you through the steps of crafting your own ergonomic office chair, ensuring it meets your specific needs and preferences.
Step 1: Define Your Requirements and Preferences
Before diving into the construction process, it's crucial to define what you need and want in your ergonomic chairs. Consider the following factors:
- Comfort Requirements: Identify the issues you currently face with your existing chair. Do you need better lumbar support? Adjustable armrests? Seat height customization?
- Body Dimensions: Take measurements of your body to ensure the chair fits you well. Measure your height, the length of your legs, and the width of your hips.
- Budget: Decide on a budget for your project. This will help you determine the materials and components you can afford.
- Aesthetic Preferences: Consider the overall look and feel you want for your chair. Do you prefer a modern, minimalist design or something more traditional?
Step 2: Gather Materials and Tools
Once you have a clear idea of what you want, gather the necessary materials and tools. Here's a basic list to get you started:
- Chair Base: This could be an existing chair base that you plan to modify or a new one purchased specifically for this project.
- Seat and Backrest: Choose materials that are supportive and comfortable. High-density foam, memory foam, or even gel inserts can be used for cushioning.
- Upholstery Fabric: Select a durable, breathable fabric that complements your design preferences.
- Mechanical Components: Depending on your design, you may need mechanisms for height adjustment, reclining, and tilt tension control.
- Tools: Common tools such as a screwdriver, drill, staple gun, and measuring tape will be essential for assembly.
Step 3: Design Your Chair
With materials in hand, it's time to sketch out the design of your chair. Consider the following design elements:
- Ergonomic Principles: Ensure your design incorporates ergonomic principles such as lumbar support, adjustable features, and proper seat depth.
- Supportive Structure: Design a sturdy frame that can support your weight comfortably without compromising on flexibility.
- Adjustability: Plan for adjustable features like seat height, armrest height, and tilt angle to accommodate different tasks and postures.
- Aesthetic Appeal: Balance functionality with aesthetics to create a chair that not only feels good but also looks great in your workspace.
Step 4: Build the Frame and Structure
Start constructing the frame and structure of your chair based on your design sketches. Here's a general outline of the construction process:
- Frame Assembly: Begin by assembling the base of the chair, which includes attaching the wheels or casters if necessary.
- Seat and Backrest: Cut and shape the seat and backrest components according to your design. Attach the foam padding and upholstery fabric securely.
- Armrests and Adjustments: Install any adjustable components such as armrests, height adjustment mechanisms, and reclining features.
- Final Assembly: Put together all the components, ensuring everything is securely fastened and functional.
Step 5: Test and Refine
Once your chair is assembled, it's time for the most critical step—testing. Sit in the chair for extended periods to evaluate its comfort and functionality. Pay attention to the following:
- Comfort: Assess whether the chair provides adequate support for your lower back, thighs, and arms.
- Adjustability: Test each adjustable feature to ensure smooth operation and stability.
- Durability: Check for any signs of wear or weakness in the structure or materials.
Based on your testing, make necessary adjustments or refinements to improve comfort and usability. This might involve adding more cushioning, adjusting the height of armrests, or fine-tuning the reclining mechanism.
Step 6: Add Final Touches
Once you're satisfied with the comfort and functionality of your chair, add the final touches to enhance its appearance and usability:
- Finishing: Apply any final finishes to the frame or wood components to protect against wear and tear.
- Extras: Consider adding features like lumbar pillows, headrests, or even integrated USB ports for charging devices.
- Documentation: Keep a record of your chair's specifications and assembly instructions for future reference or potential modifications.
Step 7: Enjoy Your Custom Creation
Congratulations! You've successfully designed and built your own ergonomic office chair tailored to your specific needs and preferences. Enjoy the comfort and satisfaction of sitting in a chair that you crafted with your own hands.
Conclusion
Designing and building your own ergonomic office chairs can be a rewarding experience, providing you with a comfortable and functional piece of furniture perfectly suited to your workspace. By following these steps and taking the time to consider your requirements, you can create a chair that not only supports your body but also enhances your productivity and well-being. Whether you're a DIY enthusiast or simply seeking a custom solution, crafting your own ergonomic office chair is a worthwhile endeavor that pays off in comfort and satisfaction.