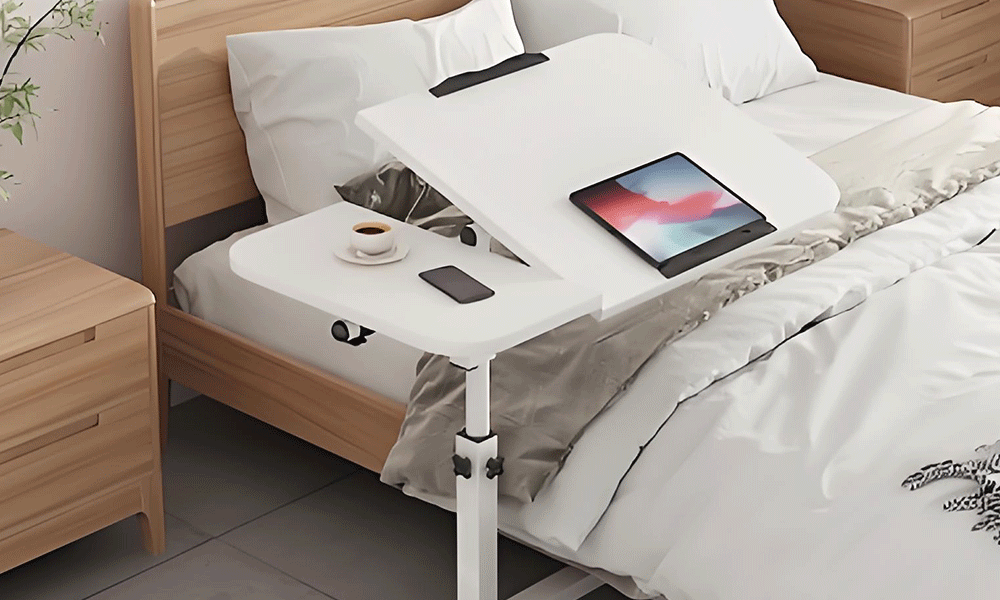
An overbed table is a practical and versatile piece of furniture that can make your life easier when you need a stable surface right next to your bed. Whether you're recovering from an illness, working from home, or simply want a handy place to eat or read in bed, a DIY overbed table can be a great solution. Plus, creating it yourself means you can customize it to fit your needs and your style. In this post, we’ll guide you through the process of building your own overbed table from scratch.
Materials You’ll Need:
- Plywood or MDF (Medium-Density Fiberboard) – This will form the tabletop.
- Wooden or metal legs – You can repurpose old furniture legs or buy new ones.
- Screws and wood glue – For securing the pieces together.
- Wooden dowels (optional) – To add extra support.
- Caster wheels (optional) – If you want your table to be mobile.
- Paint or varnish – To finish and protect the surface.
- Measuring tape, saw, and drill – Essential tools for the job.
- Sandpaper – To smooth out the edges of your table.
Step 1: Measure and Cut the Tabletop
Start by determining the size of the overbed table you want. Consider your bed size and the amount of space you need. A typical overbed table measures around 24 inches in width and 16-18 inches in depth, but feel free to adjust it based on your preferences.
Once you’ve decided on the dimensions, use your measuring tape to mark the plywood or MDF board. Then, carefully cut it to size using a saw. If you don’t have a saw, most hardware stores offer cutting services, so you can ask them to cut the wood for you. After cutting, use sandpaper to smooth out any rough edges.
Step 2: Design the Table Base
Next, you'll need to design the frame or base that will hold your tabletop above the bed. There are several options here, depending on the style and functionality you want.
Option 1: Simple Stand
- Cut four pieces of wood or metal for the legs. The length will depend on how high you want the table to sit above your bed, but a common height is around 28-30 inches.
- Attach the legs to the four corners of the tabletop using screws and wood glue. Drill pilot holes to ensure the screws go in easily and securely.
Option 2: Adjustable Height
- If you want the table to be adjustable, you can use pipe or metal poles for the legs. These can be connected to the tabletop with adjustable brackets. You can also incorporate adjustable brackets to let you change the height as needed.
Option 3: Rolling Table
- If you want mobility, add caster wheels to the bottom of each leg. This will allow you to roll the table in and out of place, which is especially helpful if you're using it to move the table around in your room. Just make sure the wheels lock in place when you're using the overbed table with wheels.
Step 3: Attach the Legs to the Tabletop
With the frame or legs prepped and ready, now it’s time to attach them to the tabletop. For a more stable hold, you can use a combination of screws and wood glue. First, apply wood glue to the top of each leg and position them in the corners of the tabletop. Use clamps to hold them in place while the glue dries. Once the glue has set, drill screws through the base into the tabletop to ensure a strong bond.
If you’re using caster wheels, screw them into the bottom of the legs. Ensure they are tightly secured and can lock in place once the table is in use.
Step 4: Sand and Paint or Varnish
To finish your overbed table, use sandpaper to smooth any rough spots. If you want a sleek, professional finish, you can paint or varnish your table to protect it and give it a polished look. Choose a paint or varnish that suits the style of your bedroom. If you want to preserve the natural look of the wood, a clear varnish will give it a warm, smooth finish. Alternatively, go for a bold color to make your table a statement piece.
Allow the paint or varnish to dry completely before moving on to the next step.
Step 5: Add Final Touches
Once your table is dry and ready to use, take a step back and evaluate its functionality. Does it fit well next to your bed? Is it at a comfortable height for eating, writing, or working? You may want to add additional features like a cup holder, a small drawer, or a storage space for your books or electronics. These touches can make your DIY overbed table even more practical.
Step 6: Use Your Overbed Table!
Now that your overbed table is complete, it’s time to start using it! Whether you use it to eat in bed, work on your laptop, or hold a lamp, you’ll appreciate having a custom-built piece of furniture tailored to your needs.
Final Thoughts
Building your own overbed table doesn’t have to be complicated. With a few basic tools, some creativity, and a little patience, you can craft a functional and stylish piece of furniture that will serve you well for years to come. Plus, it’s an excellent way to add a personal touch to your bedroom while making the most of your space.
Happy building, and enjoy your new overbed table!
